JET Program CIR Report
CIR Report from Kanazawa (5bis)
February 2013By Marlies
(Coordinator for International Relations)
Kimono dress-up!
In the first bonus report I talked about the wonders of my ikebana class. This time I would like to introduce another fascinating world I’ve started to discover… the world of kimono. (I am a sucker for all things pretty… ;-) )
It all started with wanting to buy a yukata (a one-layered cotton summer version of the kimono, today mostly worn by young people to summer festivals) to wear to the fireworks in summer (because I am young people too… despite the fact that Japanese generally estimate me about ten years older than I am… )
Shopping is always better when done in company, so I dragged my friend Yoolim along to the kimono shop to help with the picking. She waited patiently as I went back and forth between the racks, giving much needed advise (that one is cute too, don’t like the colour of that one,…) until I finally made up my mind about which one of those fabulous yukata to get… (the choice was made faster than you might think… the moment I spotted turquoise )
I wasn’t going to spend too much money on it (designer yukata can cost up to hundreds of Euros!), but couldn’t help buying a slightly expensive one cause it was simply that bit more beautiful and totally worth it (although I can count the number of times in my life I’ll get to wear it on my two hands… I am such a girl )
Anyway… this yukata turned out to be more than value for money since it came with an amazing bonus: free kitsuke (dressing) lessons to learn how to properly put on a yukata/kimono! Imagine my kimono-crazy excitement! ;-)
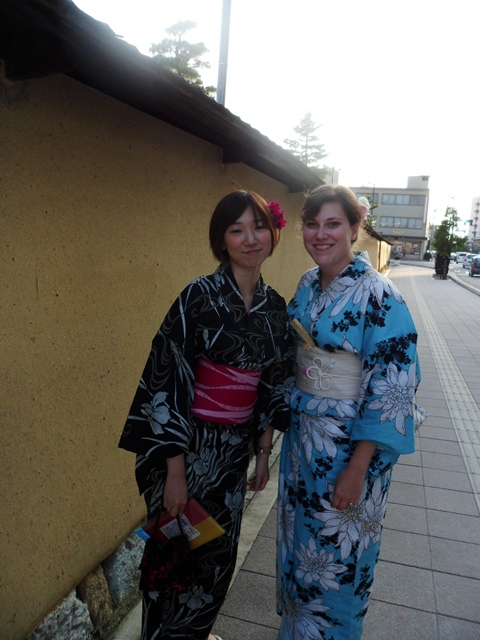
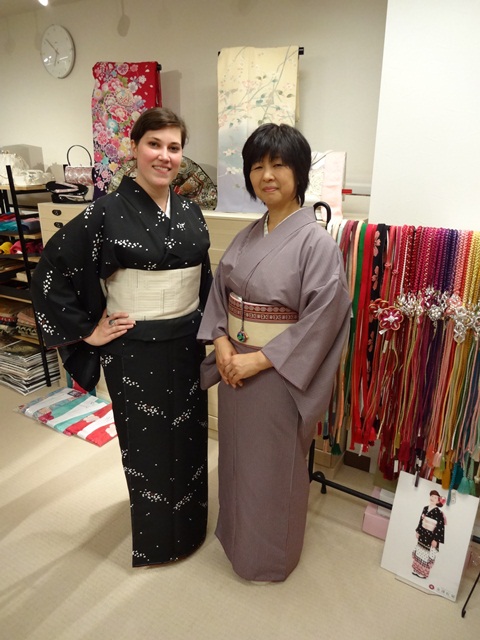
Click image to enlarge Yukata Kimono Yoolim and I decided to sign up for the kitsuke lessons together. A couple of days later, we presented ourselves at the shop for our first lesson. There was a dressing room on the second floor, where our teacher Sato-sensei would teach us the basics of yukata and kimono dressing over the course of ten lessons.
The basics in short:
Step one: “get into shape” ~ prep work
First thing you have to do before you can start wearing a kimono is getting into shape. Yes that’s right, get into “shape”. Not the exercise one (although putting on kimono is quite a work-out in itself), but the literal “shape”. And what shape might that be? Well, the ideal kimono body is a straight tube...
As you can already guess, (although Japanese women are straighter than the average European woman) most women’s bodies aren’t tubes… So those bodies are padded with towels and various other kit in order to cancel out any curves and make everything straight…
My body, which is as far from a straight tube as it gets, needs about half a linen closet wrapped around the waist before I start looking anything like… well… a tuby towel sausage really… ;-)Fortunately for wearing yukata (which is supposed to be light summer wear after all) there is only a minimum of padding and undergarments involved… In theory that is, I had to keep fending off Sensei who kept wanting to add “maybe just one more towel”
Step 2: “tidy-whities” ~ undergarments
Technically, you start with a hadajuban (literally undershirt that goes on the skin), which is kind of a slip dress, on top of which then the towels are tied. On top of the towel sausage then goes either a yukata, or in case of a kimono, another extra layer called juban, or undergarment. It may seem pretty straightforward, but in these first stages about a thousand things can go wrong already.
Each layer needs to be tied with sashes to keep everything in place. But tie them wrong and you have towels bulking up, resulting in odd-looking growths on your back ; or bundles of knots overlapping in the front, which become increasingly uncomfortable or even painful as the tight sashes that go over them, make them press down on your stomach. Moreover, creases and gathers in the undergarments have to be smoothed out meticulously, since a frumpy under layer will make the end result look untidy too.
And lastly, the collar needs special attention. Only a couple of centimetres of the undergarment will remain visible at the neck, creating the typical (usually) white collar of the kimono. A kimono should be closed up relatively high in the front (deep V’s are not done ) and instead slant slightly in the back. How closed up in front and how slanted in the back the collar goes, depends on age, occasion and personal taste… for a beginner though, it mostly depends on luck ;-)Step 3: “advanced draping” ~ outer layer
The outer layer consists of either the yukata or kimono. The wearing process is pretty similar, the only difference being that the stiff cotton yukata is easier to handle than the unruly silk of the kimono (which is also much heavier). Putting on the kimono is not just a matter of sticking your arms through the holes and tying it up randomly; there are certain set steps and movements to follow, and sashes upon sashes to be tied (in the right order) to accomplish the end result. Once you get the hang of things, you can put on a kimono in a reasonable amount of time, but for a beginner the struggle seems endless at times… To make matters even more complicated: everything that could go wrong with the under layer can go wrong with the outer layer and then some… I’ll spare you the details
Step 4: “wrap it up with a bow” ~ the obi
The final battle of kimono dressing is a wrestling match with the obi sash, which is a 2-3m long band of stiff, heavy fabric to be wrapped around the waist several times before being tied in a pretty bow on the back. Cheaters can buy ready-made obi’s that just require securing the band around one’s waist and inserting the ready-tied bow in the back… but frankly I feel that when you’ve overcome all of the previous hurdles to get this far, you shouldn’t give in to such laxness. Just suck it up and make the final effort with a self-tied obi, for the ultimate self-gratification! (…granted, it is possibly the most difficult part, but it is not rocket science )
The simplest obi, called hanhaba obi or half-width obi can be tied in front and then slid to the back. Others are harder to slide when tied, so they have to be tied on the back. Try tying an imaginary bow on your back and you’ll quickly discover that it is not quite as easy as it sounds… moreover we’re talking about a very big and heavy bow… ;-) The most elaborate obi’s cannot be tied by the wearer herself, but those are only worn on exceptional occasions and most women (don’t know how to wear kimono anyway) go to a professional dresser for that.
The colourful cords and sashes (obijime and obiage) fulfil the double function of securing the obi and sprucing it up a bit. For extra bling, you can add jewellery as well.Personally, I like the challenge of the obi (the over-achiever in me talking ;-))… It is a mad battle between me and the fabric boa constrictor; sensei finds my total lack of grace rather hilarious. Yet in the end I always get result: totally flustered but with a very decent looking obi
Step 5: “flavour”
Once you have the basics down, you can start playing around with things and add some personality into your outfit.
Variations are endless; you are your own kimono Barbie doll ______________________
Since the start of these kitsuke lessons, I have had many exciting kimono experiences. First accomplishment was of course the fireworks in our yukata… yukata which we managed to put on all by ourselves
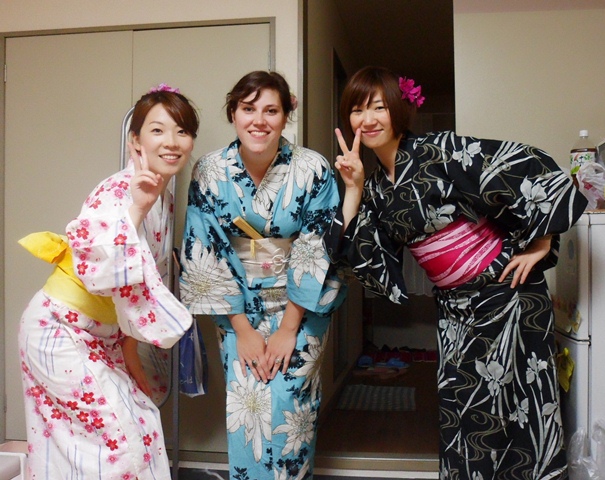
With the yukata down pat, we moved on to learning to wear kimono. Yoolim was not much of a kimono person, so there was a switch in lesson partners; instead of Yoolim came Julie, who is (like me) kimono-crazy. We were now two tall and curvy Europeans taking a kitsuke class… this meant we really had to tackle the padding issue; and finding a kimono that fit our outlandishly long limbs proved to be pretty impossible
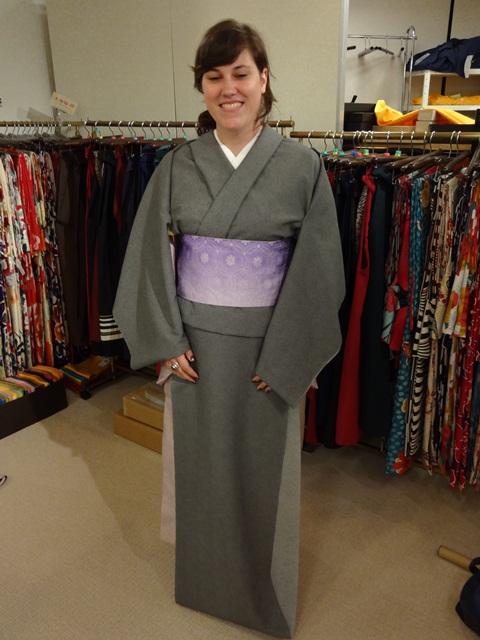
The solution to that was to have a kimono made to size. Actually, up until the recent trend of prêt-a-porter kimonos set in, kimono were always ordered and made to size. They are made out of a single bolt of fabric, and consist mainly of straight lines. The width and length of the kimono can be adjusted according to the wearer. My kimono would be made a bit wider and longer than the standard ones. The only thing I had to do was choose a fabric… and wait for my kimono to arrive
It is kind of hard to imagine what a certain fabric is going to look like as a kimono, so in order to better be able to imagine it, professional dressers use a technique, draping the bolt on the wearer’s body to make it look like an actual kimono. Pretty cool, don’t you think?
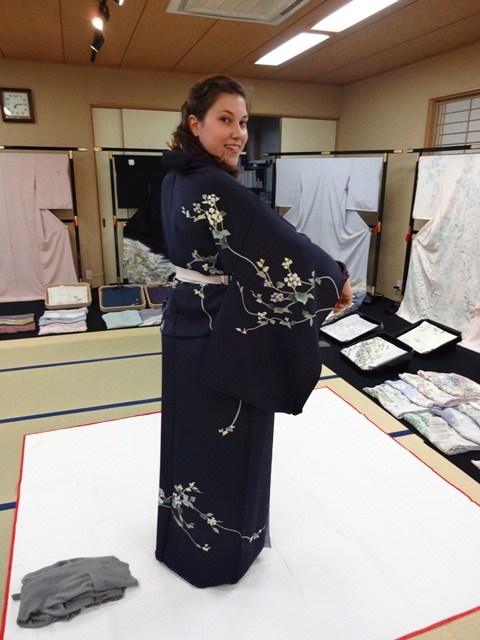
Click image to enlarge Kaga Yuzen kimono My kimono Next big affair was when sensei invited us to a Kaga yuzen kimono sale. Kaga yuzen is a gorgeous resist paste silk dyeing technique, one of the many traditional crafts famous in Kanazawa. It is a delicate and very time consuming technique, and today only a few people still master it. To give you an idea: dyeing one kimono fabric bolt takes about 3 months (or longer!). And then you still only have the fabric, which then needs to be lined and sewn into an actual kimono, another tricky process to be left to a professional. Kaga yuzen kimono are all hand made with the greatest care, and are therefore extremely expensive! (think thousands to ten thousands of Euros o_O) Although knowing that we wouldn’t be able to afford to buy anything, sensei took us there nevertheless.
We arrived at what looked like a house, and the first thing we saw upon entering was a magnificent kimono on display. We went up to the first floor and were guided into a room, where we were served tea and Japanese sweets. After finishing our tea, we could go into the next room. There were kimono karinui (kimono temporarily sewn for fitting) lined up all across the room, with dozens more folded neatly on the carpet in front. We were invited to take a look around. Sensei explained the difference between the types of kimono, and the occasions they would be appropriate for, and one of the sales staff joined us to explain a bit more about the signatures of the artists. He rolled out several obi and spread out some of the folded karinui on the floor, so we could feast our eyes on them. Almost afraid to touch such precious things, we were urged to “go ahead and have a feel as well” :-)
Seeing our eager eyes, and having no other customers to attend to, one of the salesmen then suggested: “Why don’t you try one on?” We politely declined at first (very Japanese of us), all the while thinking: “BRING ON THOSE KIMONO!!!”, before finally timidly giving in to the persistent salesman. I instantly knew which one I wanted to try on; a beautiful dark purple long-sleeved karinui with a delicate spray of white flowers spiralling up from the hem. The silk was smooth and cool, and had a nice weight to it, making the karinui float gracefully with every move. Procuring this treasure would cost me roughly 10.000 Euros, the man mentioned when I discretely inquired about it. o_O Oh well, maybe if I win the lottery some day…
(here is a link if you want to see more: http://kanehisa-corp.jp/)Not long after, my tailor-made kimono arrived at the shop, so I could finally practice dressing in something that fit my towel-sausaged body perfectly from head to toe. ;-) It still wasn’t an easy task though; my dressing required correctional pulling and tucking by sensei to make it look nice and neat. But… practice makes perfect, right
The biggest challenge came when I was invited to the x-mas tea party organized by the kimono shop. Lots of clients and other kitsuke students gathered at the shop that day to get changed into kimono, so it was pretty busy. Sensei directed me to the usual corner and told me to get dressed… by myself! … But I managed to do it! Then we all went out together in our colourful kimono and had a wonderful time.
(Beniya blog link: http://www.kanazawa-beniya.jp/blog/?p=6802)Only a few more lessons to go before I “graduate” kitsuke class now… It is kind of sad that it will be over so soon. However I am really grateful to the people from Beniya for allowing me this peek into the world of kimono, and especially grateful to Sato-sensei, who taught me a wealth of things.
I hope you all liked reading about it too
Groetjes uit Kanazawa,
Marlies